Getting started
Install memberr Order Editing, enable the editing window, and turn on the modules customers need.
Get from install to a working Thank You page editor in a few steps. Customers edit on the Shopify Thank You page and the order status page in the customer account. Optional upsells appear on the Thank You page and on Shopify's post-purchase interstitial (between payment and Thank You).
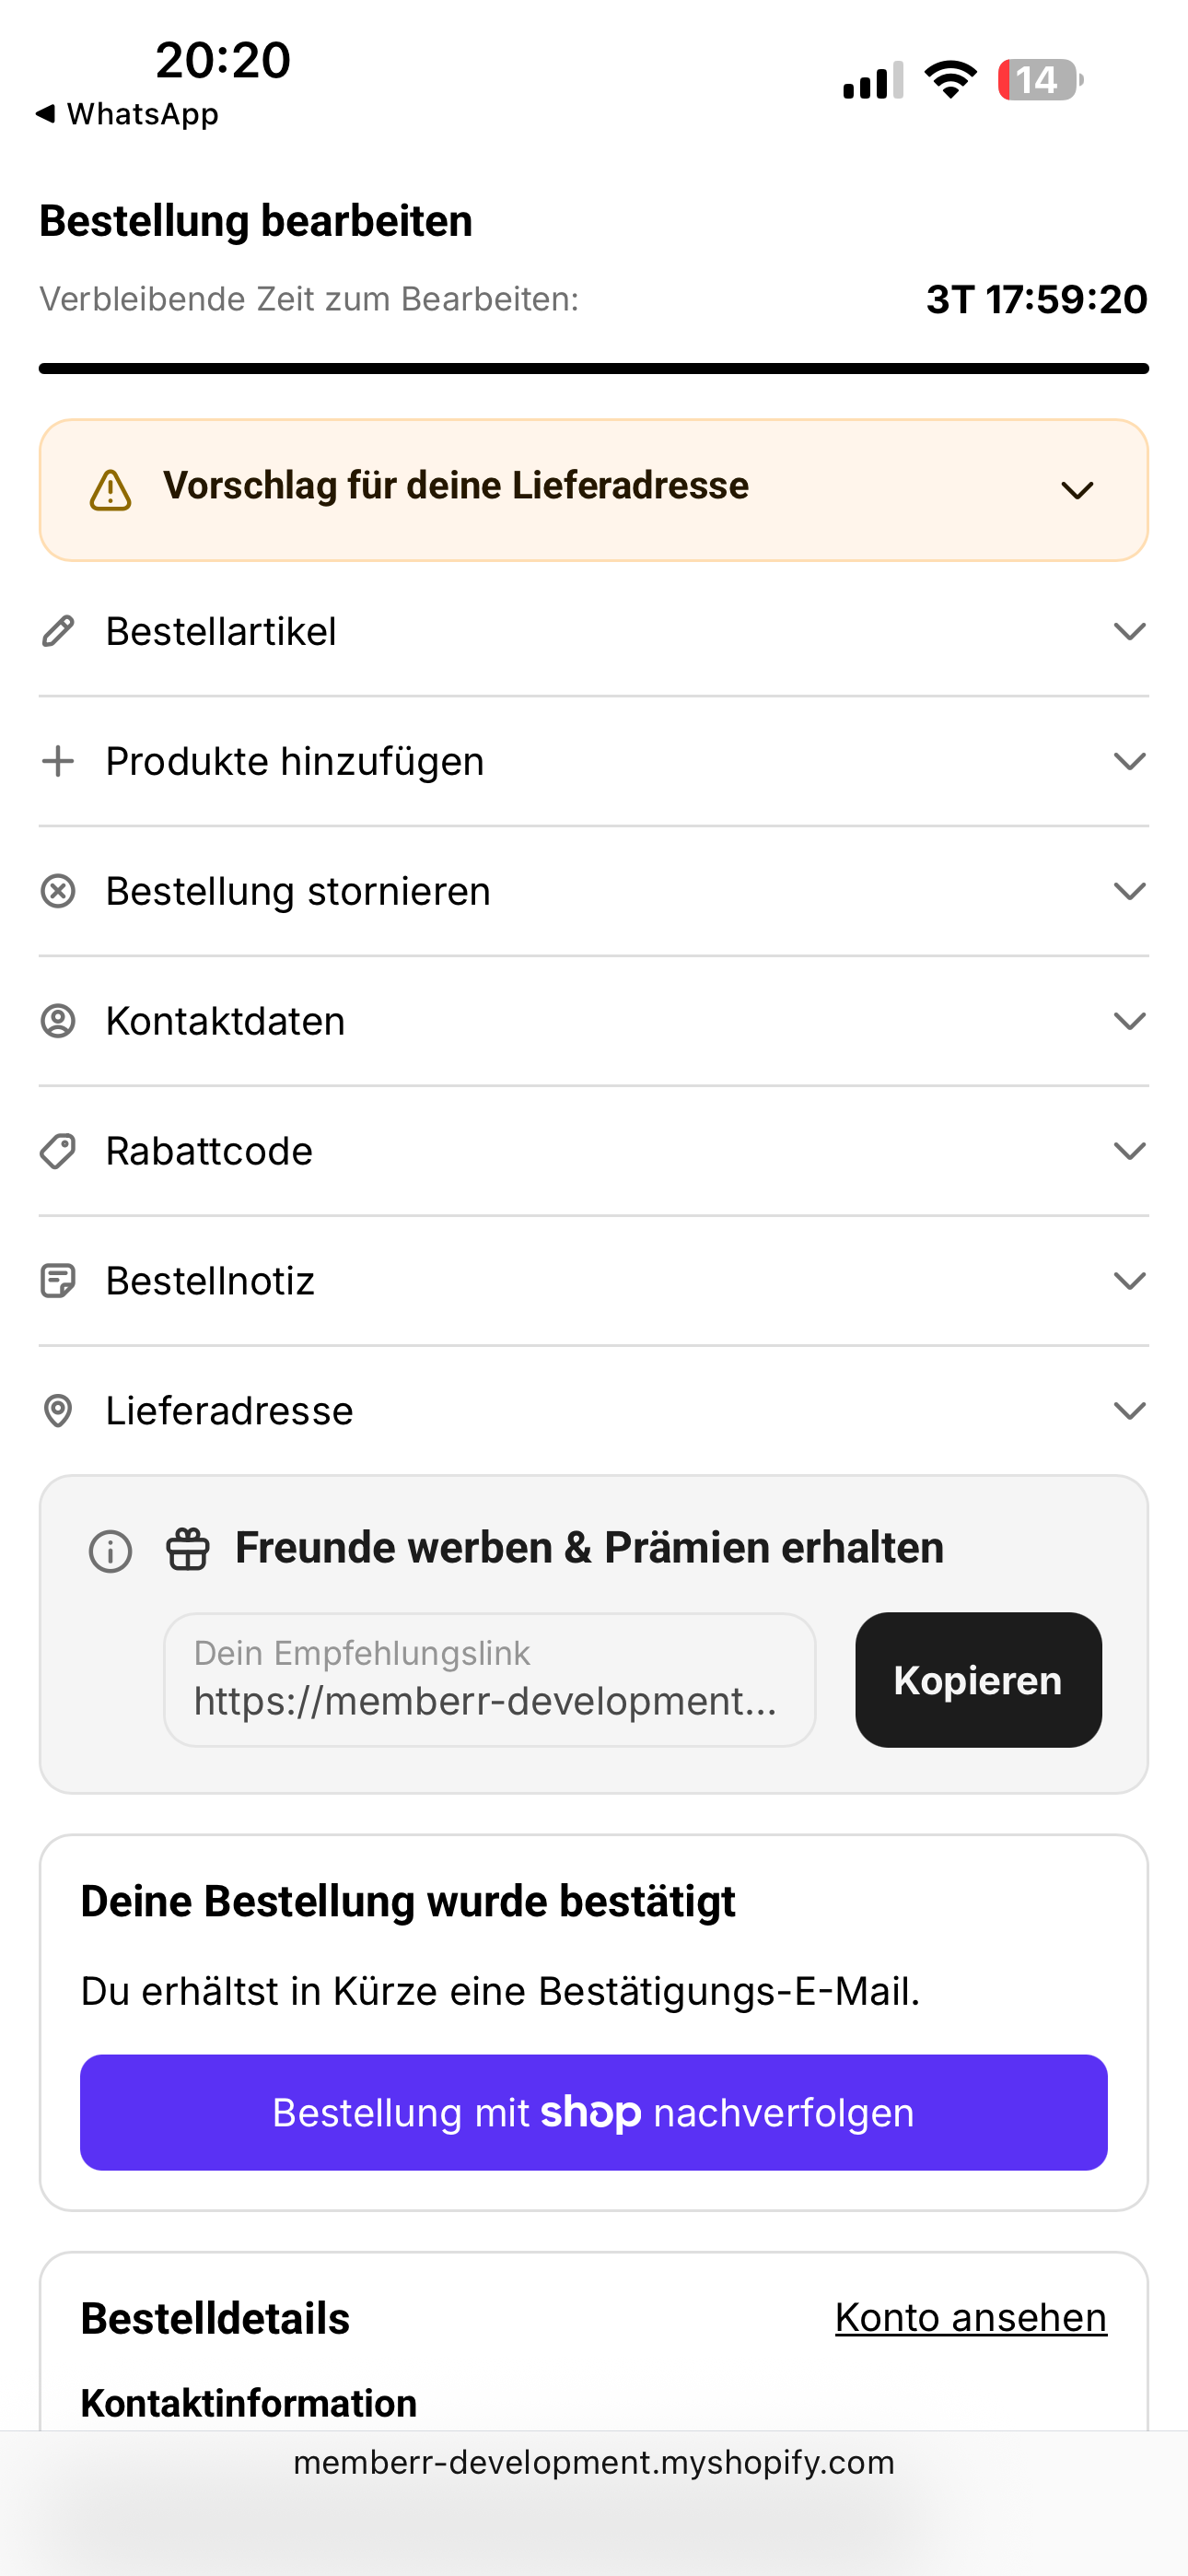
Setup checklist
- Install memberr Order Editing from the Shopify App Store and open the app.
- Open General and turn on Enable order editing.
- Set the Editing window (minutes, hours, or days - max 7 days) so customers know how long they can change the order.
- Turn on Place orders on hold during the editing window so fulfillment does not ship an outdated order while edits are still allowed.
- Open Customer Experience, enable the modules you want, and drag them into the order customers should see.
- (Optional) Enable Address validation so incorrect shipping addresses get a correction suggestion before the package leaves.
- (Optional) Configure Upsells - Smart Upsells and/or authored Thank You / post-purchase flows.
Where customers edit
| Surface | What appears |
|---|---|
| Thank You page | Edit-order shell (timer + modules), optional Smart Upsells / flow offers |
| Order status page | Same edit shell when the window is still open |
| Post-purchase page | Shopify interstitial between payment and Thank You - one-tap upsells only (not the full editor) |
See What customers see for a full walkthrough of the storefront.
Markets
Most settings under General, Restrictions, Payments, Operations, Shipping, Address validation, Customer Experience, and upsell flows support Customize for this market. When the toggle is off, that section inherits the global configuration.
Smart Upsells and Extension analytics run org-wide - they are not per-market yet.